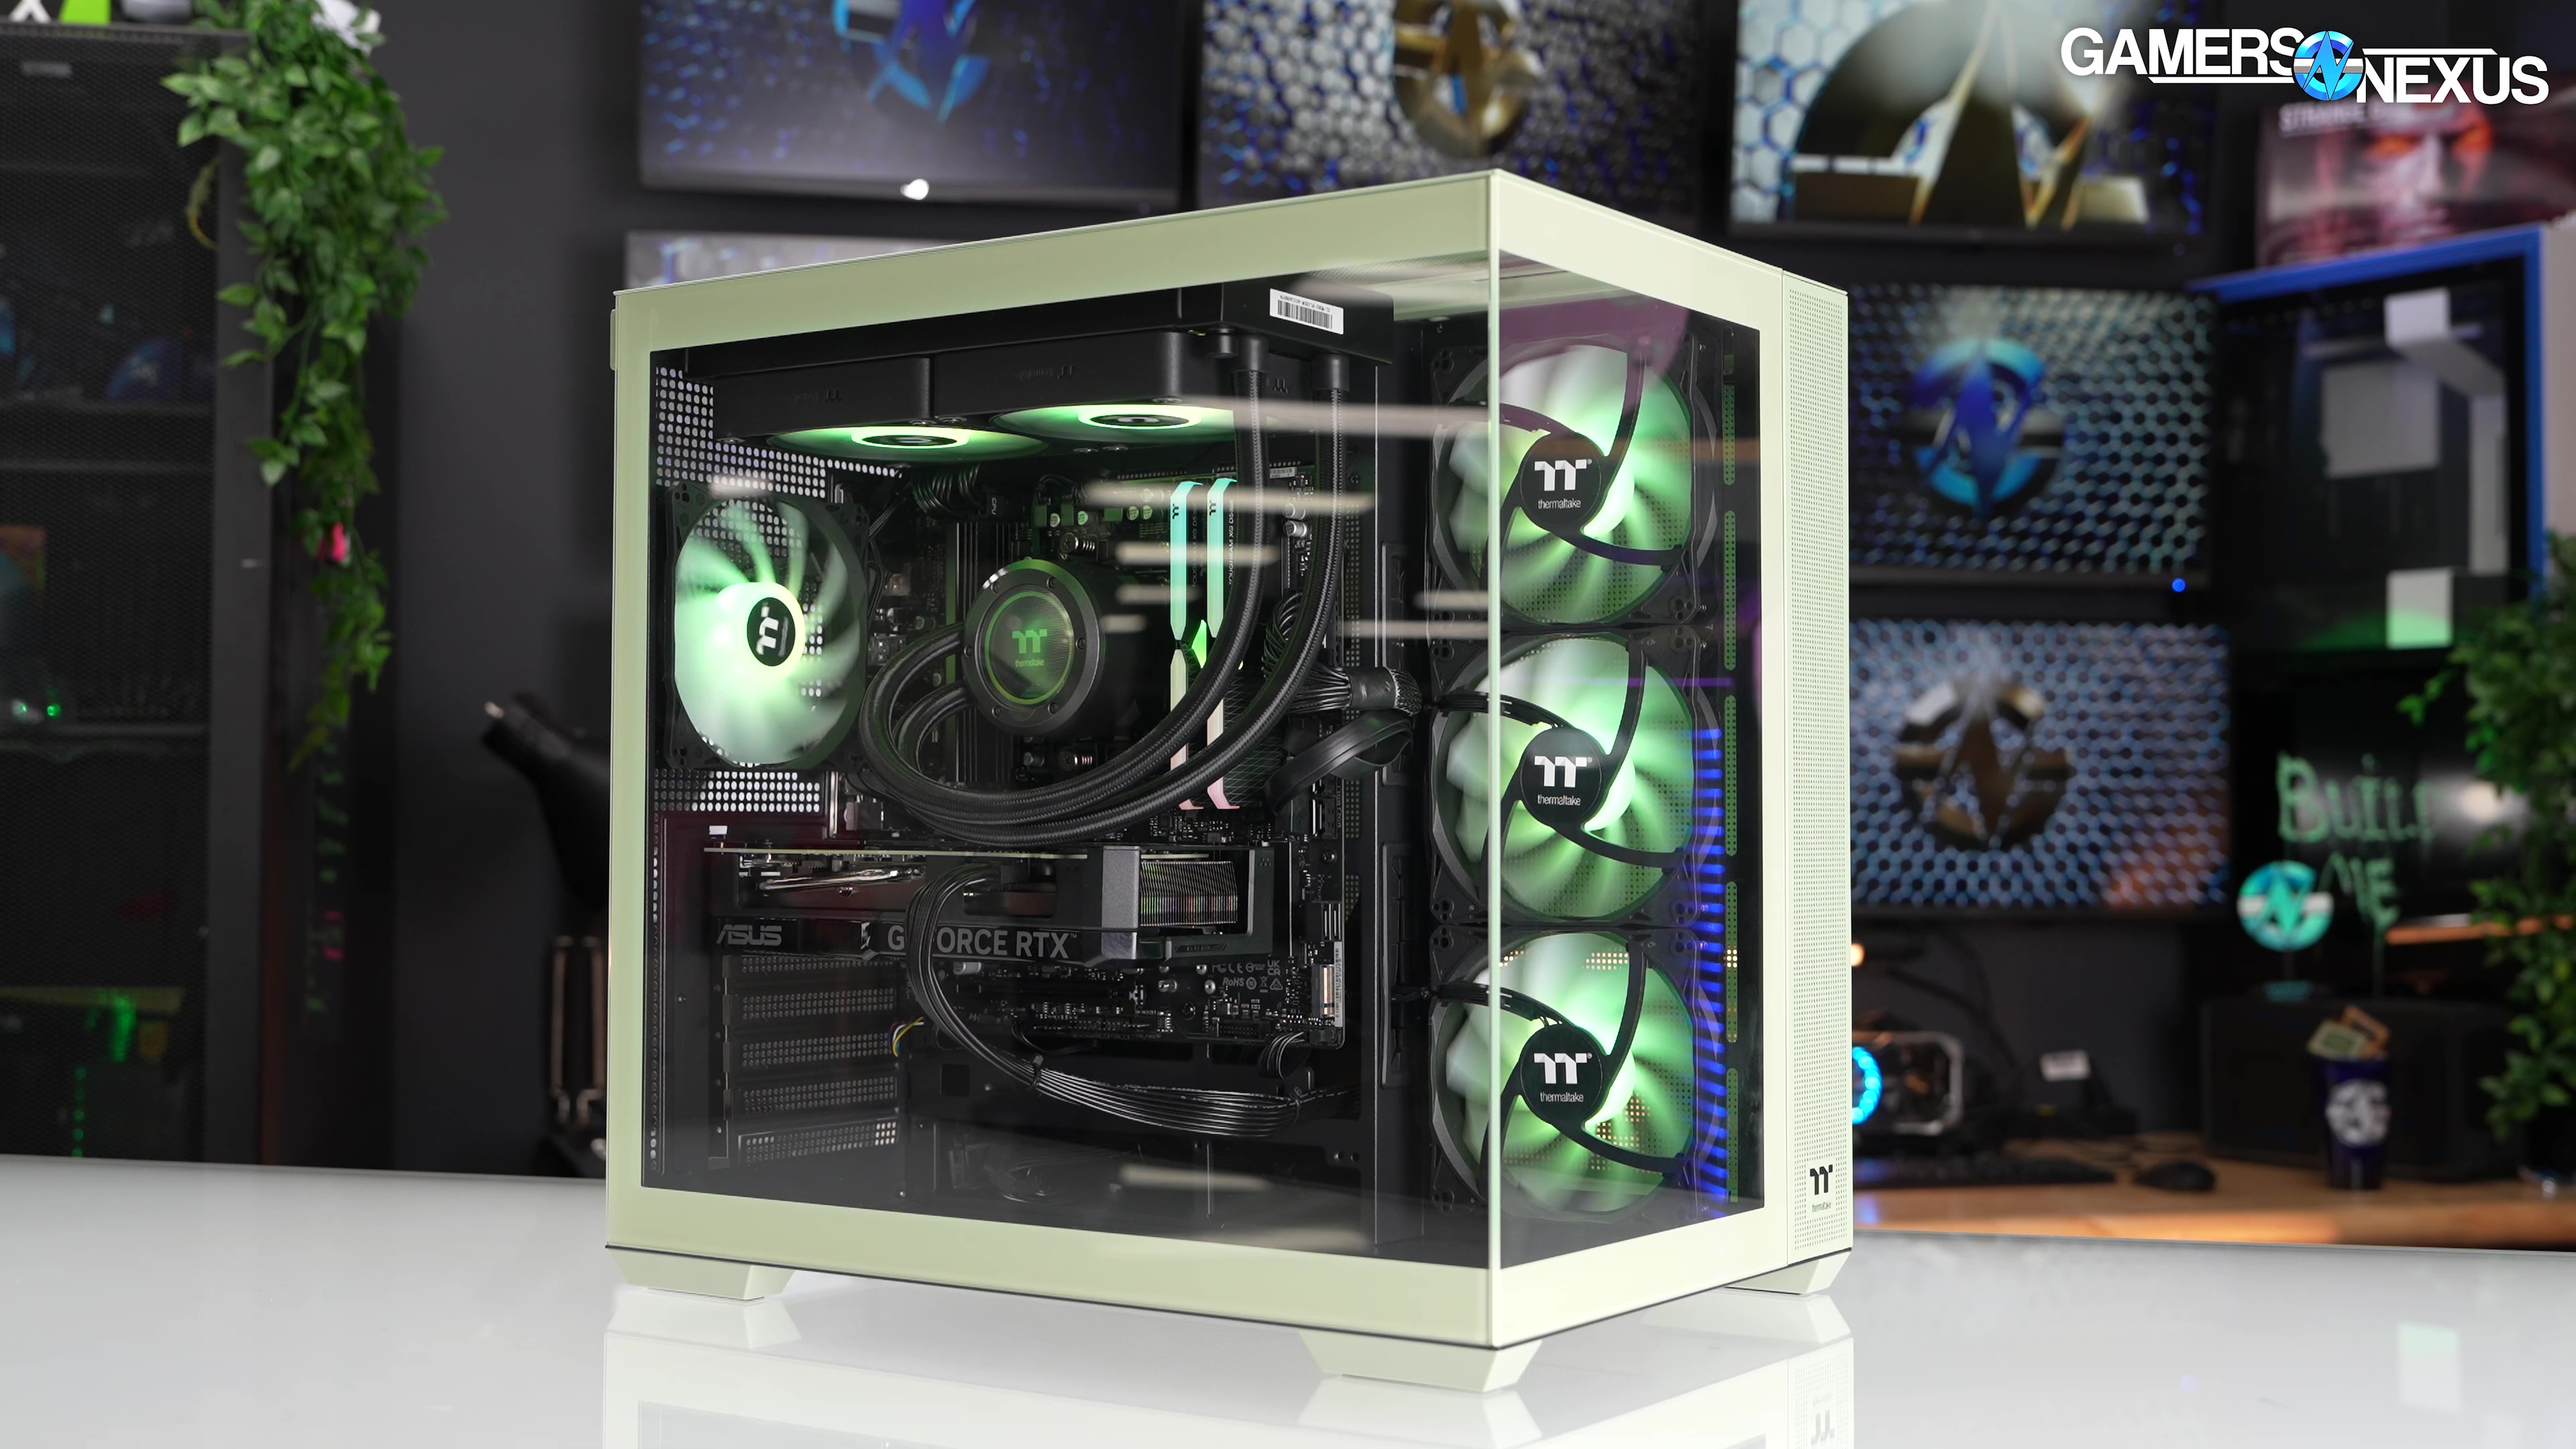
One of the Best Pre-Built PCs We've Reviewed: $1700 Thermaltake Vista 470M
Last Updated:
We examine Thermaltake’s Vista 470M’s build quality, value, software, power, thermals, acoustics, and more
The Highlights
- Our build came with an 7800X3D, 4070 Super, and Thermaltake View 380 case
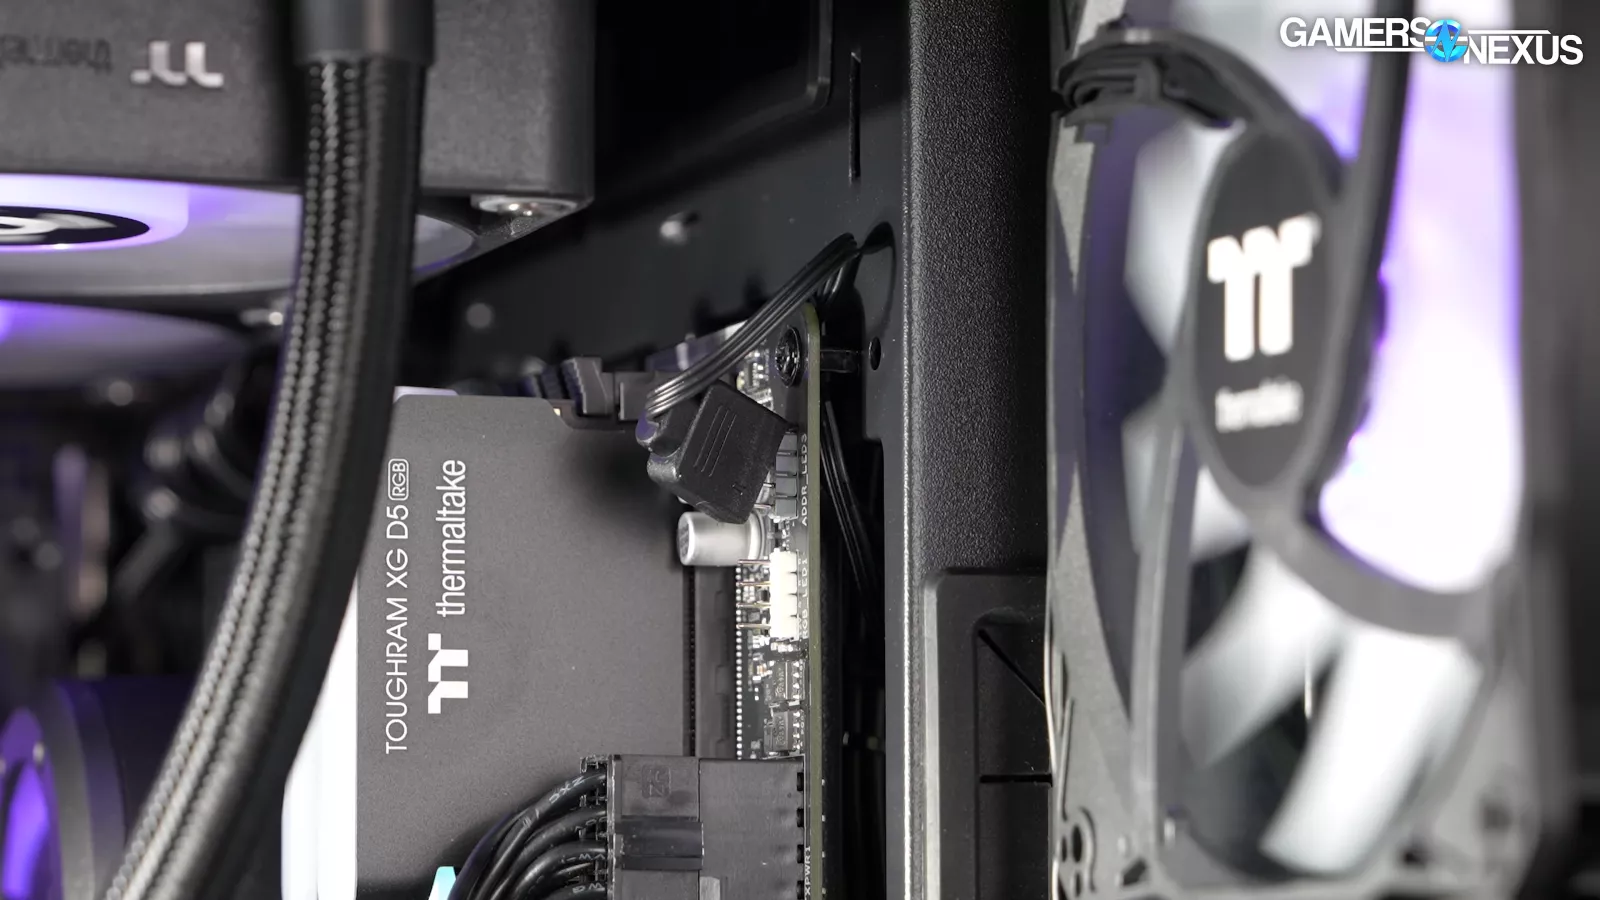
- Out unit had 2 loose RGB headers and a slightly bent pin
- The Thermaltake Vista 470M is a surprisingly good pre-built PC
- Original MSRP: $1,700 (approximately)
- Release Date: October 2024
Table of Contents
- AutoTOC
Intro
Between rental PCs, pre-built disasters, and just bad value, we’ve had a hard time finding good pre-builts over the last few years. We specifically went hunting to actively try and find one of the better mainstream options on the market.
We bought the Thermaltake Vista 470M for around $1,700 and, surprisingly, it’s actually pretty good. This system has an AMD 7800X3D, which is already a huge improvement on most SIs still offering primarily Intel from some prehistoric marketing collaborations. It’s also priced reasonably.
Editor's note: This was originally published on December 19, 2024 as a video. This content has been adapted to written format for this article and is unchanged from the original publication.
Credits
Test Lead, Host, Writing
Steve Burke
Video Editing
Mike Gaglione
Testing, Writing
Jeremy Clayton
Writing, Web Editing
Jimmy Thang
We’ve never looked at a Thermaltake pre-built before, but they’ve been building them for a few years now. This one just launched at the start of October. It’s the Vista 470M, from the LCGS (Liquid Cooled Gaming System) brand of custom and pre-built PCs.

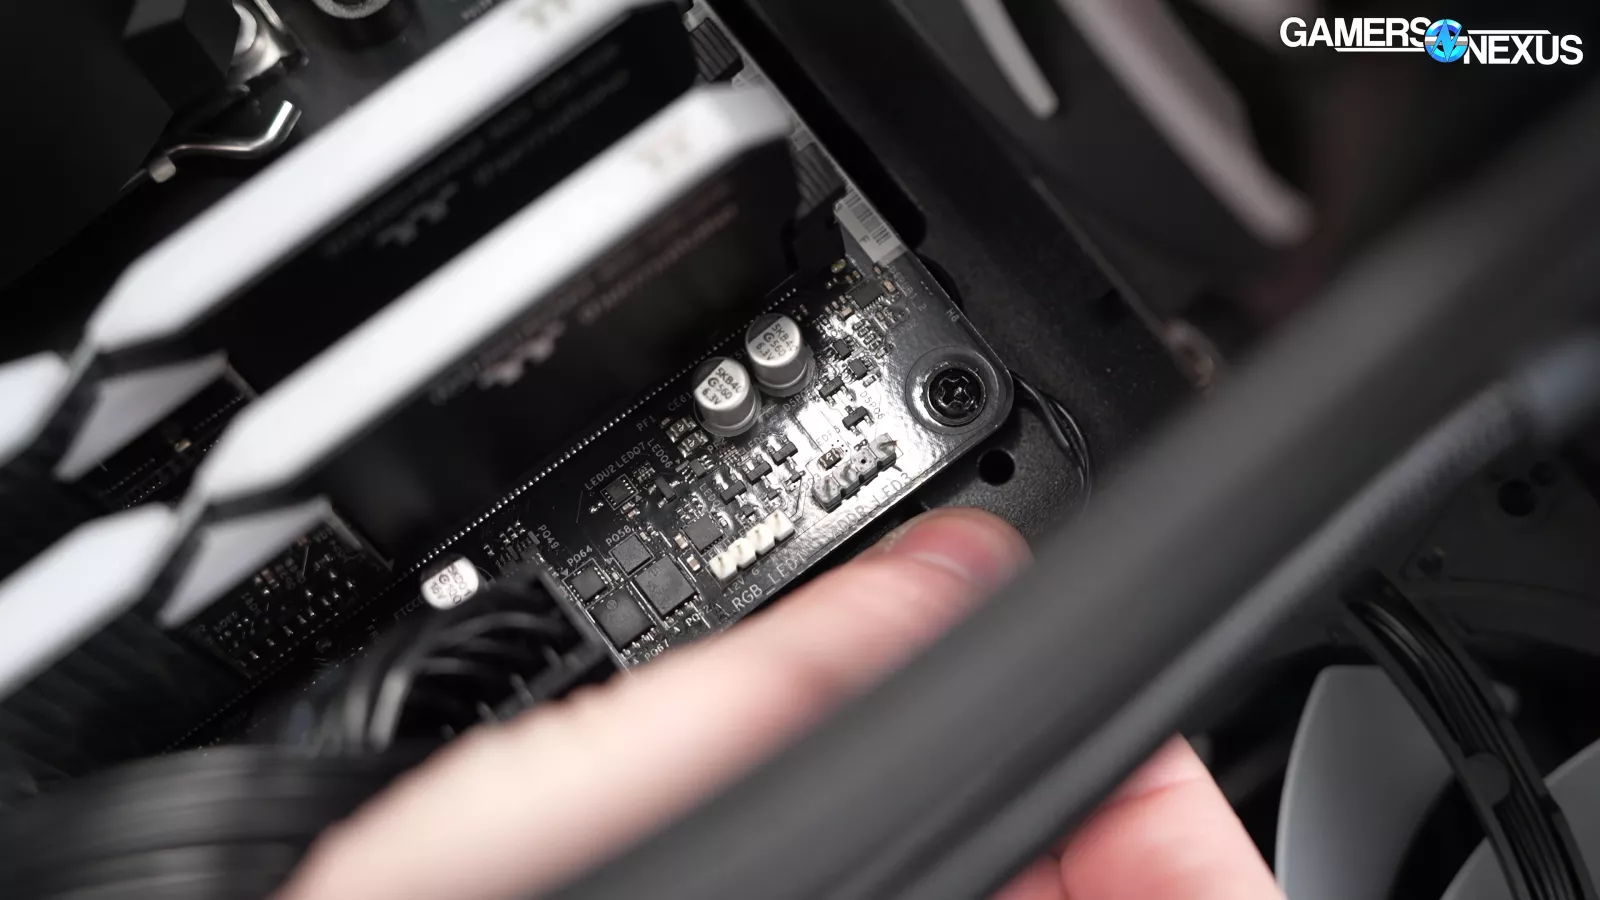
It’s got reasonable pricing and mostly good build quality. That “mostly” is because despite overall great cable management, Thermaltake managed to seriously bend one of the RGB connections to the motherboard – that’s one way to keep the terrible lock-lacking 4-pin from going anywhere, unintentional as this is. The system is also running relatively slow RAM, but sadly, in the pre-built world, these types of complaints are relatively minor.
But in spite of this, we actually kind of like this system. That’s probably the highest praise we’ve given a pre-built other than the Starforge systems we’ve looked at. Maybe that should be our new award category: The highly sought-after “We Actually Kind of Like It” award.
Thermaltake Vista 470M Overview
Marketing is normally loaded with memes, so we’ll start there:

“Embrace the exhilarating promise of domination,” Thermaltake says in surprisingly tame marketing cringe, and that’s about it. The rest of the language is pretty normal: Talk of completing a battle station, edge-to-edge glass, the usual MDF-fueled NVIDIA and AMD branding, and talk of the components. Shockingly, the only thing on this page that was worth making fun of was the exhilarating promise of domination. Once again, for a pre-built, this is already one of the more professional listings.

In the past, we’ve seen Corsair’s no-fewer-than 6 assorted “uncompromised” claims on a PC that embodied the very definition of compromise, so this is good from Thermaltake.

As we write this, Thermaltake is only offering its 470M in the Matcha Green colorway of the dual-chamber View 380 case. There aren't any other options if you don’t like it, but at the very least, it’s a unique color.
Thermaltake Vista 470M Pricing
Pricing for the 470M is pretty good, especially compared to some of the more expensive pre-builts we’ve looked at recently. Here’s the breakdown. We put together a pricing table for the components at the time we bought the system. This doesn’t reflect the newest prices in December, but is from when we actually purchased it.
Thermaltake Vista 470M Part and Price Breakdown | GamersNexus
| Part Name | DIY Equivalent Part | DIY Part Price | |
| CPU | AMD Ryzen 7 7800X3D | Identical | $476 |
| CPU Cooler | Thermaltake 240mm CLC | Identical | $80 |
| Motherboard | ASRock B650M-C | ASRock B650M PG Lightning Wifi | $120 |
| Memory | 32GB DDR5-5600 | 32GB DDR5-6000 | $85 |
| Storage | 1TB M.2 Gen4 SSD | Identical | $55 |
| GPU | NVIDIA RTX 4070 Super | Identical | $590 |
| Case | Thermaltake View 380 ARGB | Identical | $100 |
| Power Supply | Thermaltake Toughpower GX3 850W | Identical | $85 |
| Price | $1,700 | DIY Price | ~$1600 |
There’s only about $100 of upcharge over DIY part cost, with the usual fluctuations of the DIY market. We think that’s completely reasonable, especially if you value saving time and don’t care as much about assembling it yourself. At the depths of sales, you might find about $200 to $250, but even that is a good price: Starforge was typically around $400 to $650 cost over DIY, with iBUYPOWER and CyberPower typically about $100 to $400, depending on model.
As always, you could find greater savings by totally swapping some of the components in this list, but we try to compare exact part-for-part in these pricing tables.
It’s not perfect though. The launch of the higher-performing 9800X3D (read our review) at the same price as what the 7800X3D has been available for recently casts somewhat of a shadow on the overall value, but the 7800X3D (watch our review) is still a strong 2nd place in almost all of our gaming tests. Part of the pricing may be explained by Thermaltake getting the remains of the 7800X3D that has become suddenly less desirable.
The DDR5-5600 RAM is also, unfortunately, a terrible choice, given that the “sweet spot” for AM5 is at 6000MT/s and it’s essentially universally compatible across all of the current CPUs.
It doesn’t even really cost more at this point to get better RAM -- the pricing is similar.
Thermaltake accidentally benefits from the higher cache on the X3D CPU helping to brute force and make up for some of that weaker RAM choice.

The motherboard and power supply are on the lower end, but don’t cross over into truly cheap territory. Also, since it’s 850W, the possibility of a future GPU upgrade is there.
And because you own the system, unlike NZXT’s envisioned nightmarish dystopian hellscape that is its rental program, you could upgrade it with whatever you wanted.
The ASRock B650M-C is a commercial variant of a consumer board, but thankfully has a publicly accessible support page with BIOS and drivers. This is a huge improvement over what we’ve seen in the past, including Corsair using commercial variant boards without any public BIOS maintenance.
Overall, the parts choice and pricing are better than a lot of the pre-builts we’ve looked at.
Let’s get into the tear-down next.
Thermaltake Vista 470M Tear-Down
Removing a single screw on top of the case allows you to remove the case's side panel.

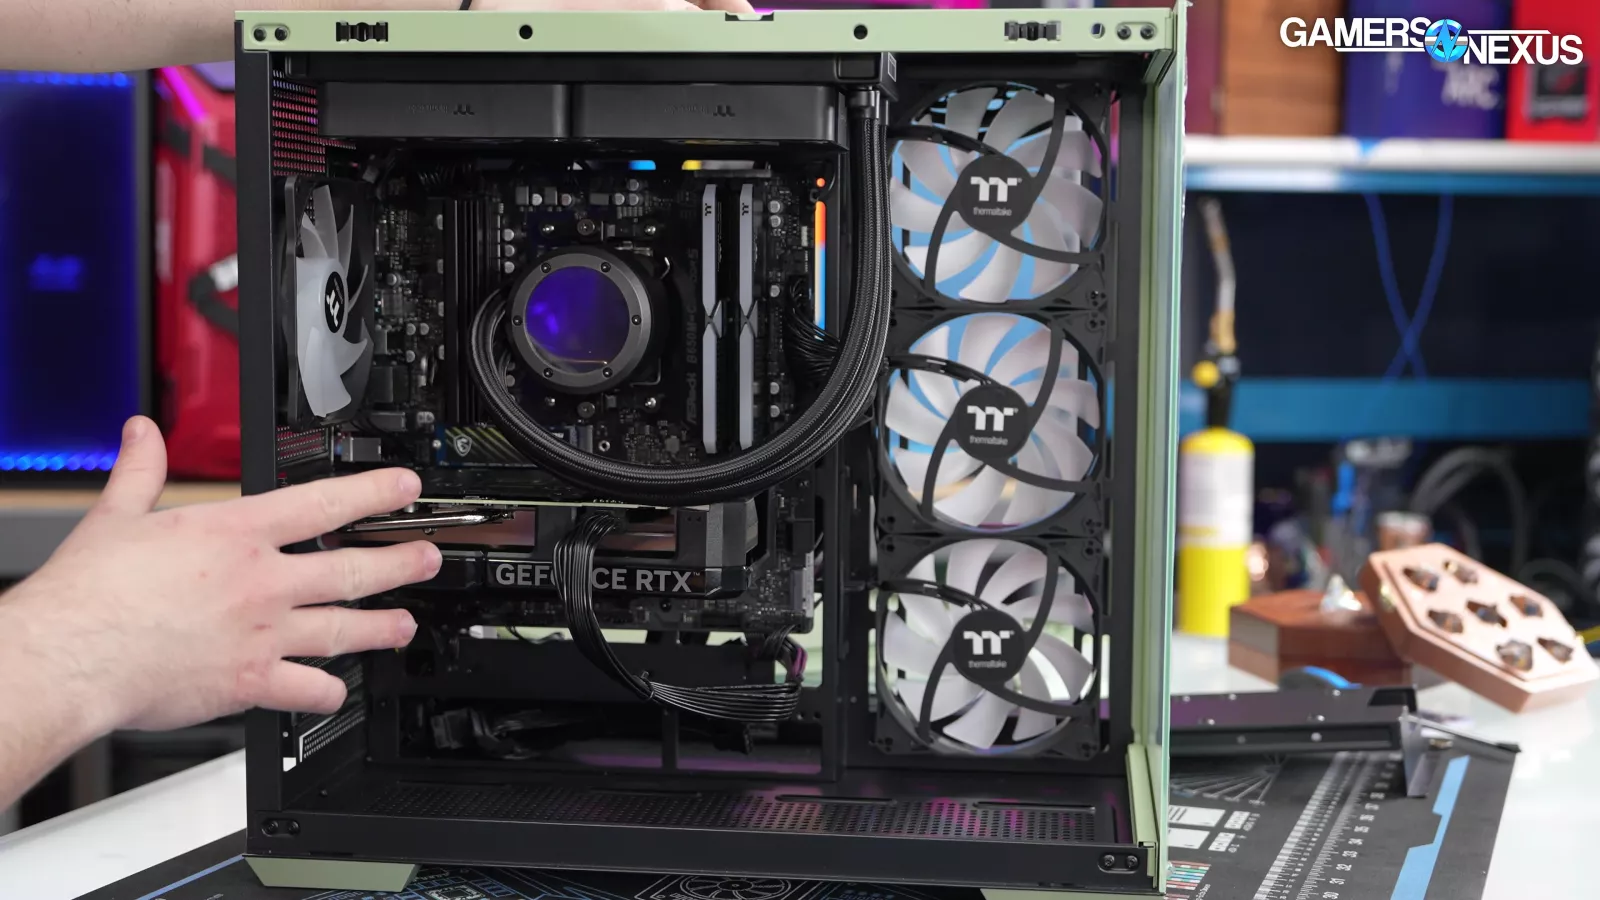
The backside cabling of the 470M is incredibly clean and reveals a non-modular PSU, which goes to show Thermaltake’s high quality cable management.
The company hid cables at the bottom of the case behind a cover, which makes sense.
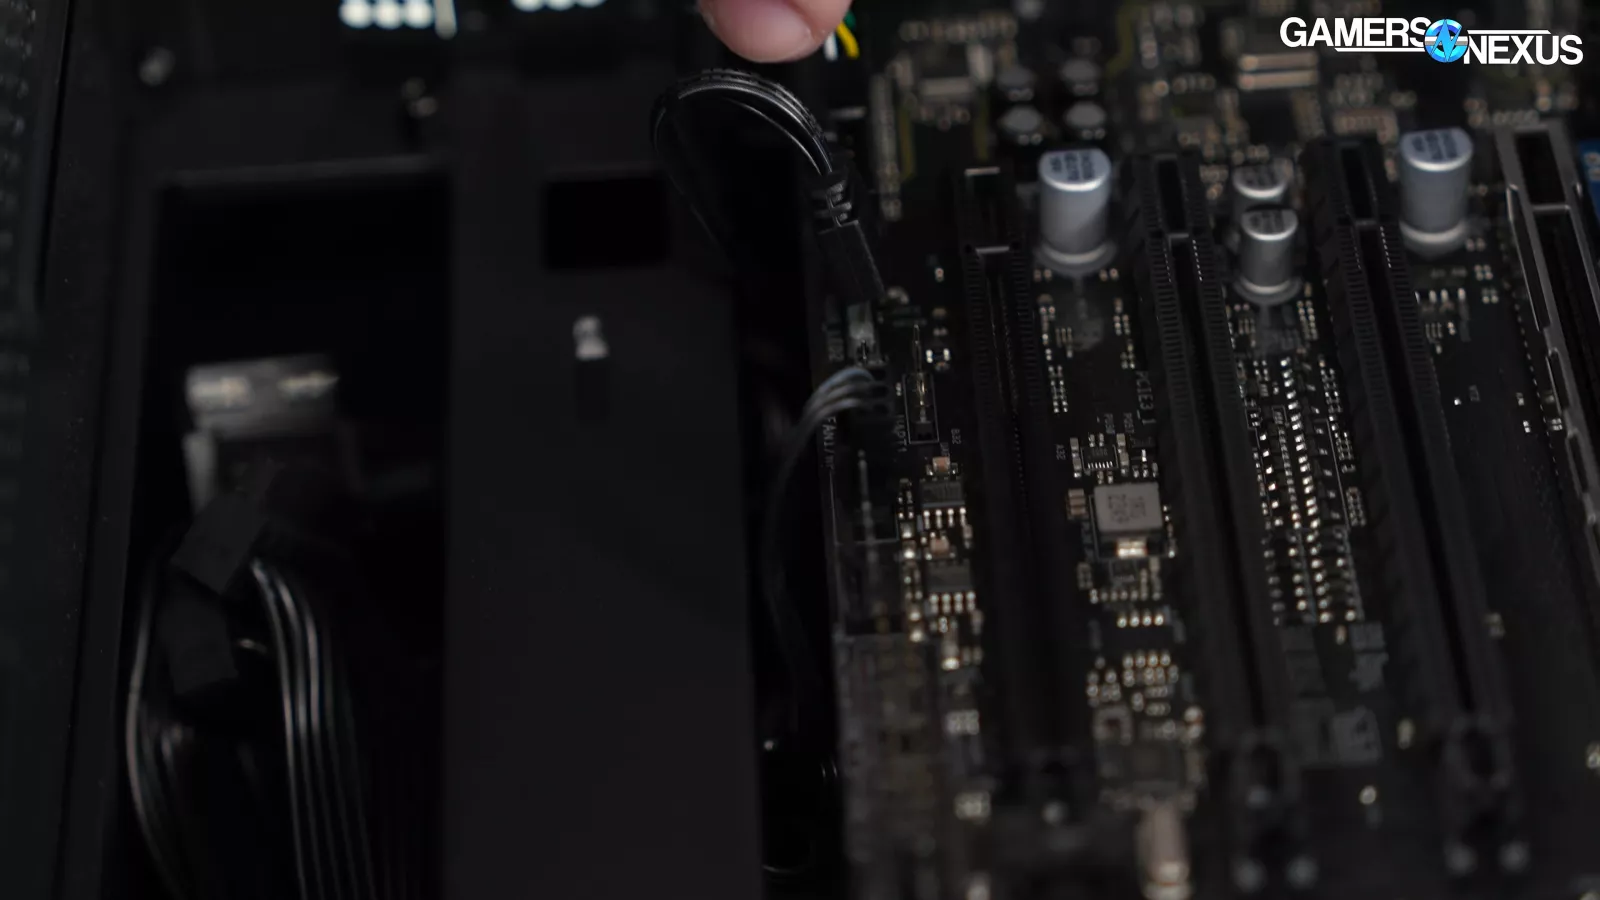
The main interior of the build has a clean assembly, though we did notice 2 loose RGB headers with one of them having a bent pin. It still worked, but that isn’t great.
Thankfully, we didn’t notice any loose screws, which is pretty rare to see.

Our 470M used a lower quality 450-watt 12VHPWR cable for its GPU. Fortunately the GPU in our system, a 4070 Super (read our review), won’t pull something higher like 600 watts, but this will prevent GPU upgrade options, like the 4090 (watch our review). So that’s not great and we would have preferred a 600-watt solution.

With the CPU cooler removed, the paste on the processor looks okay. There was one corner which could have used a little more thermal paste. We can also see there was a lot of force applied to it. Thermally, it was fine in our testing.
Back to the system review. All of this testing was completed prior to the tear-down.
BIOS, OS Setup, and Software

The BIOS didn’t have any negative surprises, and was set to stock values outside of EXPO being turned on, which is good. This should be the norm, but because companies fail at enabling EXPO and XMP so frequently, it actually becomes the mark of a prodigal system integrator. That’s a sad statement, but experience has unfortunately set low expectations. The only strange thing was the date being set to January 31, 2024, which was easily fixed. The CMOS battery did not seem to be faulty. It just looked to be misconfigured.
There was nothing else to mention in BIOS, which is good.

Windows setup was normal, thankfully devoid of any third-party software agreements deceptively tacked on at the end. Booting into Windows was clean, without any pop-up app assault. The desktop had a screenshot of a Superposition benchmark result, indicating the system was probably tested prior to packaging. Having a result stored locally for the customer is excellent, as it offers a means to calibrate against the expectation and gives customer support a way to help direct the consumer to a performance gauge.

The only additional software on the system was the ASRock RGB utility, which provides some functionality. There was no bloatware otherwise: No Norton or McAfee, no BS gaming services, and just a clean OS.

The pre-installed NVIDIA graphics driver was version 565.90 from October 1, less than a week prior to our original order date and only three days before the 470M even went on sale. This is awesome to see: Thermaltake might be better about getting the latest version into its builds than some other SIs we’ve looked at – it’s hard to definitively say with only a single data point, but other systems we’ve reviewed have sometimes had very outdated drivers, upwards of 3 or 4 months out of date, which isn’t good.

As a downside: There was a missing driver in Device Manager. Research showed it’s AMD’s 3D V-cache driver. It should be installed but disabled with the 7800X3D. We would like to see it installed, but Thermaltake lucked into the fact that this is a single CCD CPU, so this wasn’t disastrous. It absolutely shouldn’t be missing, but Thermaltake would only truly suffer for it if this were a dual-CCD solution with 3D cache.
Altogether, Thermaltake did a great job with providing a clean BIOS and OS setup with up-to-date drivers. We really didn’t have a lot of complaints here.
We’ll get into benchmarks now.
Thermaltake Vista 470M Benchmarks

Power - Full Torture

Full system power measured at the wall is up first in our charts. This is captured while the system is running a full CPU plus GPU load with Blender and Port Royal on loop. System power consumption idles at around 60-70W and then climbs to roughly 150W during the brief CPU-only load portion, then jumps over 360W when the GPU joins in. It’s stable overall, and during our steady-state period, results in a 370W average. With an 850W PSU, Thermaltake has gone slightly overkill on the power supply, but not in a bad way. Most power supplies are at peak efficiency somewhere in the 40% to 60% range of utilization for capacity, although it depends on the power supply. 850W gives just enough headroom for an upgrade without increasing cost unnecessarily while also staying within a reasonable efficiency range.
Thermals - Full Torture

Next is a simple bar chart of all thermals at steady-state in the same workload. The GPU has plenty of access to fresh air, keeping itself to 68 degrees Celsius on the core, 75 degrees on the memory, and 80 degrees hotspot. This is all completely fine.
The CPU at steady state is 77 degrees, which is within the expected range for the 7800X3D with a competent 240mm liquid cooler. RAM SPD Hub and SSD temperatures were fine, showing a slight delta between the two RAM sticks. That’s normal.
Thermals are relatively hard to screw-up in this case since it’s so heavily perforated and includes 3 side intake fans, a 240 liquid cooler, and a rear exhaust fan. Thermaltake did not screw them up, so that’s also a good sign. Overall, the cooling configuration is good and performs well for what it is. We don’t have any problems with the CPU or GPU temperatures here.
CPU Thermals vs. Fan Speed - Full Torture

The chart above shows CPU temperature over time and plotted against fan speed. There’s an initial spike in temperature around the 200-second mark, which causes the liquid cooler’s pump (recorded as CPU1) and fan speeds to spike to control it. Outside of that initial burst, the rest of the curve is gradual, without any sudden ramps. This is all good as it should help avoid noticeable, annoying, and sudden changes in noise. Fan hysteresis seems good here.
The cooler fans topped out at 1908 RPM AVG, but the chassis fans only reached 429 RPM AVG. This is so low that we doubt they're contributing much at all to the overall cooling. The system doesn’t really need them to be going faster, but this points to them being improperly configured.
We think it’d be better to boost these speeds at least a couple hundred RPM to make some use of the fans, as currently, they are borderline ornamental at those speeds. It would actually result in a quieter system if Thermaltake slightly dropped the speed of the higher RPM fans and slightly increased the speed of the side fans, as they’d get rid of some of the higher frequencies in the noise spectrum by reducing the higher RPM fans. This would yield a better overall balance for the system than setting a few fans high and the rest so low that they do nearly nothing.
Acoustics - Full Torture
We’ll wrap up the charts with acoustic testing.
This is done in our hemi-anechoic chamber that we built last year. We’ve been getting a ton of use out of this chamber for testing. The reason we built the chamber is to ensure a consistent test environment day-to-day. You’d be shocked how much daily external noise changes as picked up on decibel meters, and without good controls, we wouldn’t be able to fairly test and evaluate systems against each other from day to day as the conditions would be constantly changing. Our chamber allows us to eliminate external noises that aren’t from the computer, so if there’s a truck outside or some high-pitched wind whistling or something like that, we eliminate all of it with the chamber. That means we are correctly attributing system noise to the system itself, not to our own environmental factors that aren’t present in your situation.

The image above is a plot of dBA over time during the same full system load. The average noise level during idle was 18 dBA. Noise levels during steady-state reached 31.1 dBA. What we’re really looking at here is the ramp: Thermaltake’s system ramped to full noise level over a period of about 10 minutes, which is great. That means Thermaltake isn’t unnecessarily rapidly ramping and de-ramping the fans (other than that initial spike) and is utilizing time to slowly increase the speeds. This would help control noise levels during spikier workloads.
Frequency Spectrum

Here’s a quick frequency spectrum plot with data collected in our acoustic chamber.
The Thermaltake 470M under steady state full load had its largest spikes at the 223 and 380 Hz frequencies, followed by a dip, then another small spike at 500 Hz. Overall, this noise profile is fine. There is a slight spike at 1600-1700 Hz which could be flattened a bit by lowering the pump speed and CPU cooler fan speed slightly, but overall, there’s not a lot to complain about with it.
Packaging
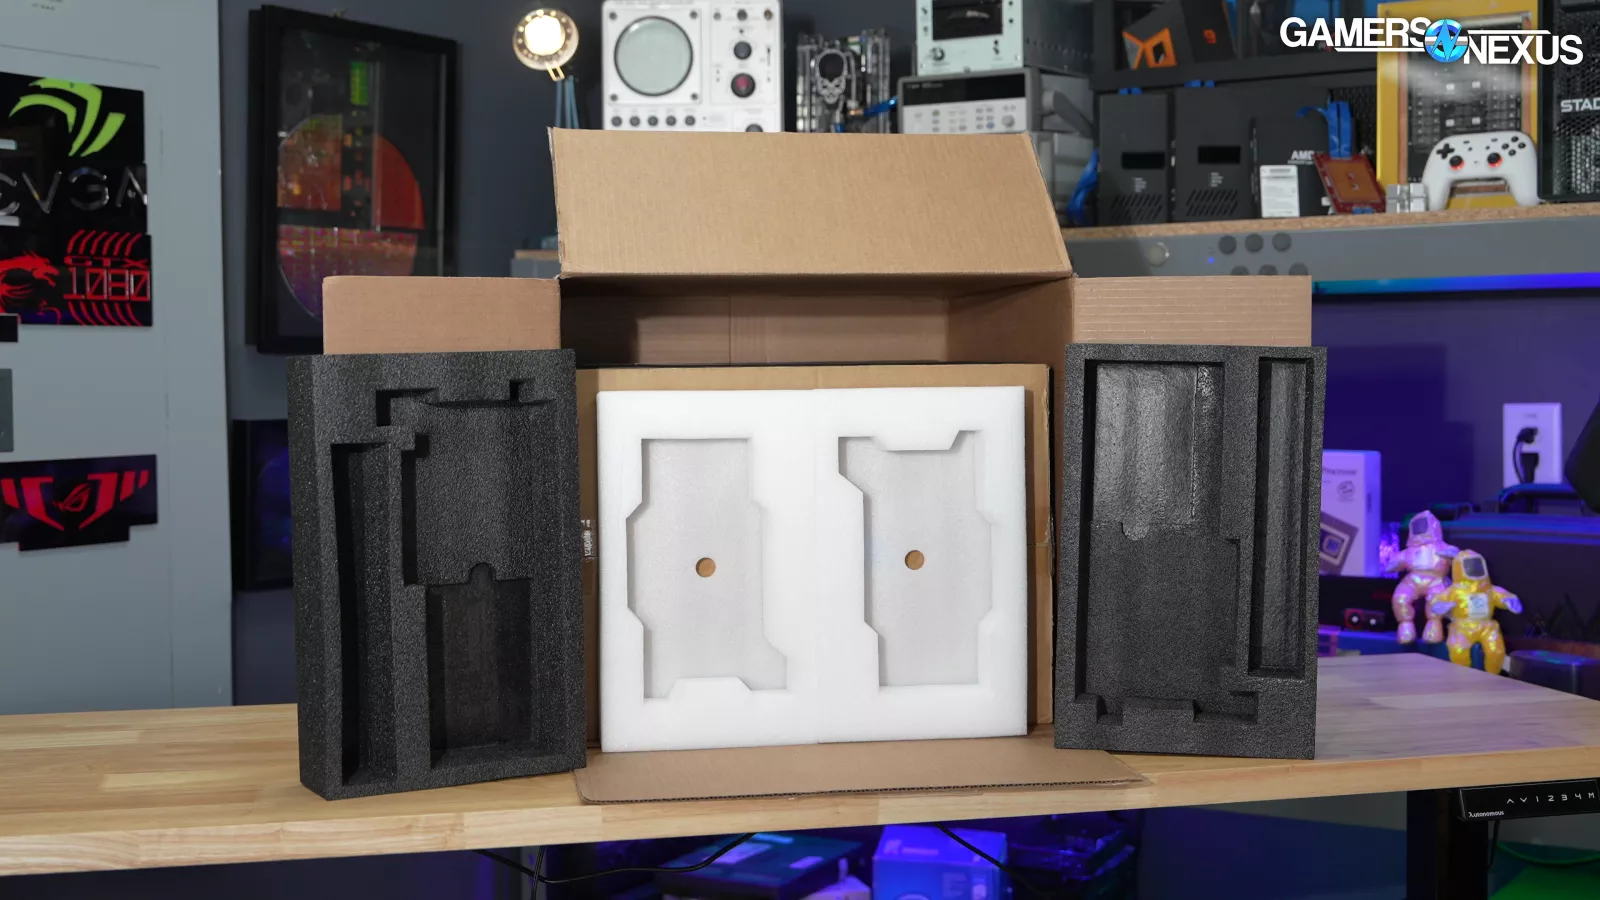
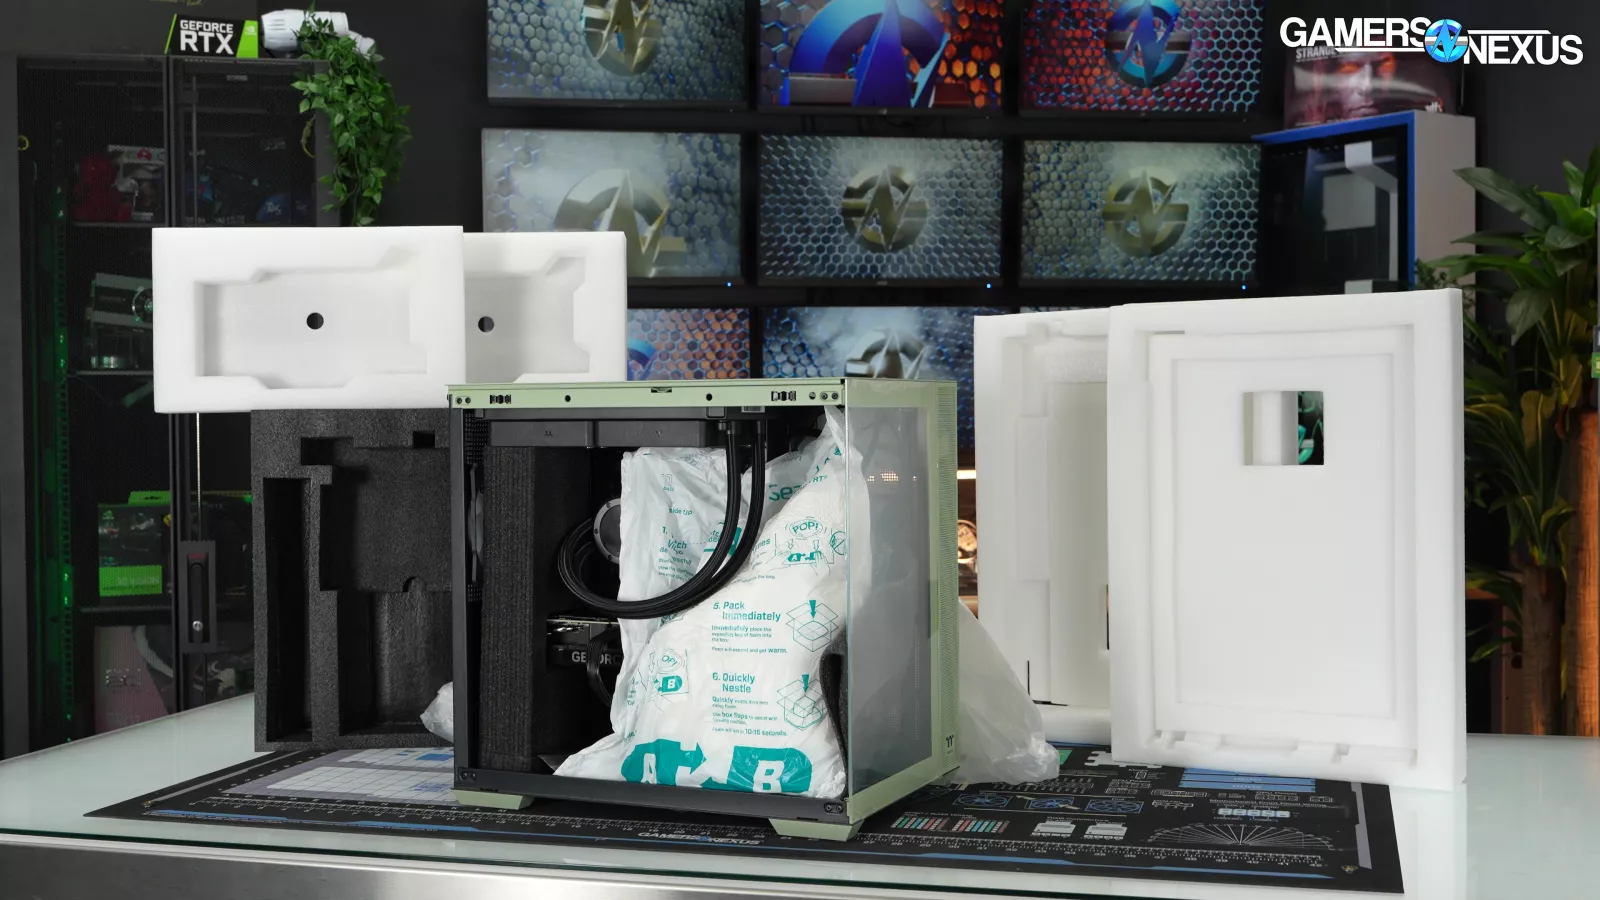
Thermaltake’s packaging was generally pretty good, utilizing the tried and true box-in-a-box method, but with the oddity of using GPU box foam inserts as packing material (and from a different GPU than the one in our system, no less). We have no way to know if this is routine practice or if the warehouse just ran out of the usual stuff – at least it’s recycling. The PC itself was packed inside the case box as usual.
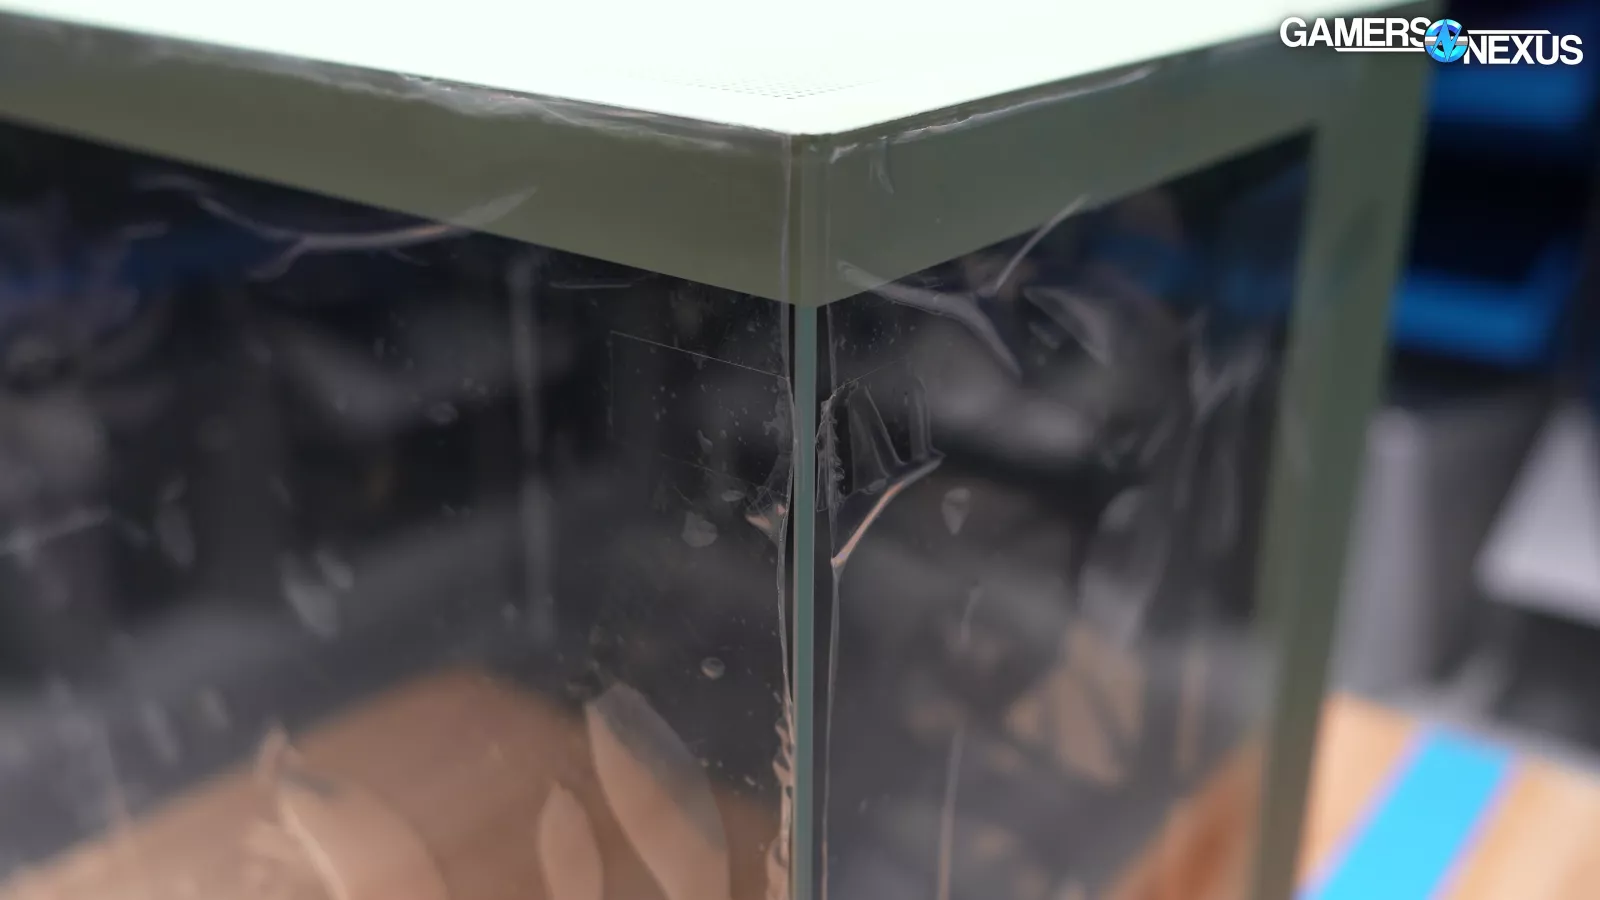
The glass side panel was screwed in for transit, which was good, and was taped to the front glass panel, which was annoying. But at least for the positives, making use of the glass security screw is the correct move and we’re happy to see it get its proper use.
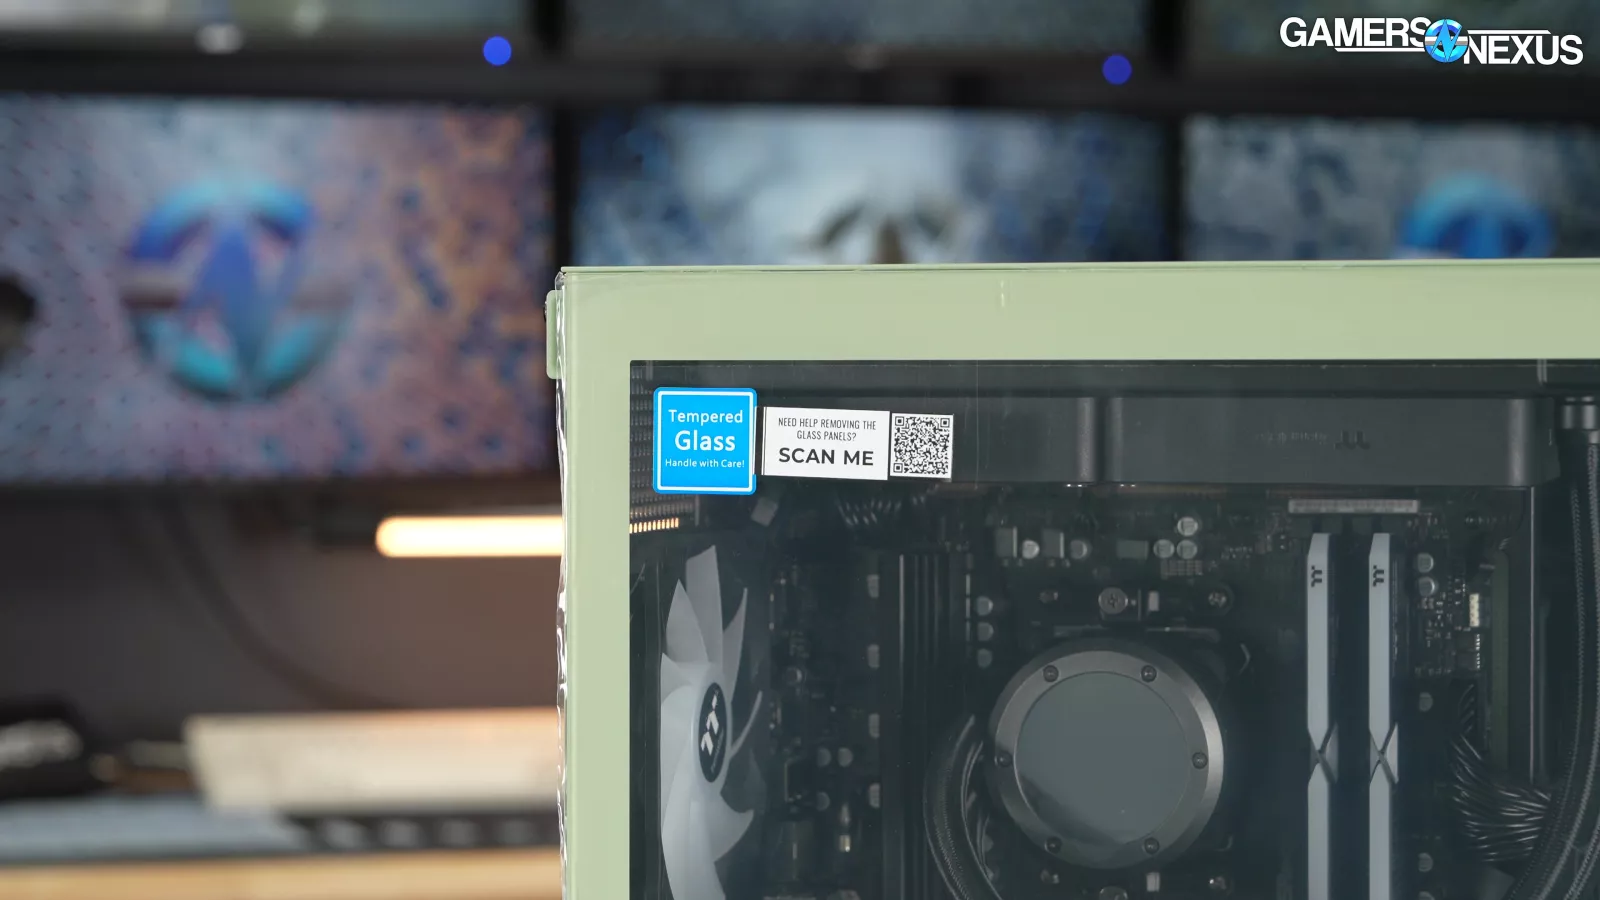
There was a QR code linking to instructions on how to remove the side panel. This is a bit strange since it’s a lot of extra steps to get to the answer: It technically works, but a simple instructional pictograph would be a lot better since they’re printing and applying a sticker anyway, so applying a sticker with a QR code to basically a single step is a roundabout way of conveying a message in the same space as the code itself.
The inside of the case was well-packed with a mixture of both closed-cell and expanding foams. Thermaltake did an adequate job of protecting the system during shipping. Ours did not sustain any shipping damage. We were overall happy with how this was packaged.
Accessories

Now for the accessories: The included quick start guide provides an actually helpful primer for setup, especially for novices. Step 1 clearly instructs the user to plug the monitor into the GPU and not the motherboard, which should help prevent the number one easy mistake, and it also notes to flip the PSU switch to on, which should prevent the second most common easy mistake.
The bag of accessories inside the case has the case manual, SATA cables, WiFi antennae, extra screws, and, curiously, two 12VHPWR adapters. One of them is the official NVIDIA adapter that probably came with the 4070 Super and the other is a mismatched-white that just looks bad. Nothing in the build is white themed, so we assume this was an accidental inclusion. Including the native NVIDIA adapter is good though, as there are a lot of reasons a user may want it in the future. Keeping the card’s accessories with the card is the right move and we’re happy to see it. Some SIs just toss the extras, which could minimally pose issues for second-hand resale when done with the system.

We’re not sure if this is better or worse than the used Sharpie PRO we got from NZXT. We didn’t end up mentioning that in the NZXT video because it didn’t matter compared to the utter trainwreck that Flex is, but we actually got sent a used Sharpie in the accessory box. Maybe it’s a trap so they can charge us for the entire cost of the system if we don’t include the Sharpie upon return.
Anyway, at least in reference to this, Thermaltake is looking good. We were overall satisfied with the accessories included.
Thermaltake Vista 470M Conclusion
The quick version of the conclusion is this: The Thermaltake Vista 470M pre-built is one of the best we’ve looked at recently, alongside the Starforge Lowkey. It’s also the best value for money we’ve seen since probably the Maingear Vybe in 2022 (watch our review). The upcharge over DIY is only about $100, which is pretty much as good as it gets outside of major SI clearance sales. And even with the more recent sales since we bought the system, it might be at most $200 to $250 upcharge.
Part selection makes sense outside of the slow DDR5-5600 – matching a still-excellent and efficient last-gen X3D CPU with the upper-midrange 4070 Super. It ends up being a good build. Thermaltake also doesn’t back the user into any corners with something like a proprietary motherboard that won’t get regular BIOS updates, which is good. The 850W PSU leaves overhead for a GPU upgrade down the road.
Now that the 9800X3D is out for effectively the same price, we’d like to see Thermaltake update the SKU with the new CPU and keep MSRP the same.

Build quality is overall good: Cable management was well-done, with the only major negative of the assembly being a bent RGB header.
The system’s setup was also a major positive for Thermaltake. The BIOS was sensibly configured and the Windows 11 install was clean, with impressively fresh GPU drivers. The only oddity there was a missing X3D driver that’s only necessary to the dual CCD parts, which the 7800X3D isn’t. As general best practice, we still like to see all drivers installed and no yellow bangs (!) in the device manager.
Thermals across the whole build are well managed, with CPU and GPU temperatures within expected ranges. Fan curves and acoustics are also good, with the one exception being the chassis fans never ramping up.
Thermaltake could improve upon its fan configuration by reducing the CPU speeds in the curve and increasing the case panel speeds, which would slightly lower noise and create a more desirable acoustic profile, but with the same thermal results.
We’re overall impressed with this system. After how many bad pre-builts we’ve looked at recently, we specifically went hunting for good ones and bought several. Of those, one was bad -- and that’s coming up soon -- and another coming up looks promising. This one went well. This is our first Thermaltake pre-built we’ve bought. We’d feel comfortable recommending this one. It’s a big plus to see AMD in use where it makes sense too, as a lot of the system integrators and OEMs are still embedded with Intel.
Well done to Thermaltake. We’ll probably give this system to someone we know since we expect it won’t come back with any problems.


